Πώς να σχεδιάσετε αεροπλάνο (εικόνες)
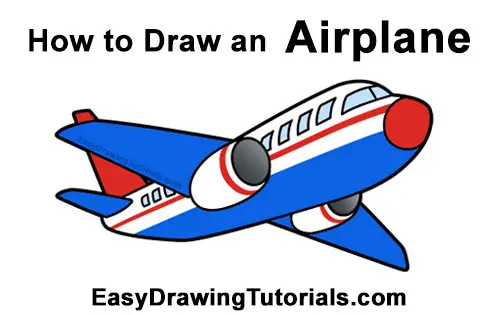
How to Draw an Airplane Step-by-Step Pictures

Intro: Start off with a pencil sketch. In the beginning stages, don’t press down too hard. Use light, smooth strokes for sketching.


Step 2: Starting at the top of the window, draw a line that slopes toward the lower, left side for the top part of the plane. Curve the shape above the window. The longer this line is, the longer your airplane will be.

Step 3: At the end of the line, draw an oval for the front part of the airplane's first engine. Sketch lightly at first so that it's easy to erase if you make a mistake. When you get the shape right, darken the line.

Step 4: To the left of the oval, draw an arc for the back portion of the airplane's engine. This shape should be similar to the letter U on its side.

Step 5: Starting on top of the airplane's engine, draw a line that stretches to the left for the top of the first wing. Don't draw this line too long. Curve the left tip downward a little bit.

Step 6: Draw a sloping line underneath for the lower edge of the airplane's wing.

Step 7: Draw a short line to the left of the wing for the visible part of the back of the plane. To the left, draw a small, rectangular shape for the horizontal stabilizer on the tail. This shape should be similar to the wing, only much smaller.

Step 8: Above that, draw a tall, triangle-like shape for the vertical stabilizer on the tail. The airplane's wing will block a big part of this section, so only draw the visible part using a few short lines.

Step 9: Below the front window, draw a big curved line similar to a backward letter C for the front of the plane. Make the top section of this shape a bit thinner and somewhat pointier.

Step 10: Draw a long line that slopes to the lower, left side for the bottom of the airplane. Curve the left end of the line upward to meet the tail.

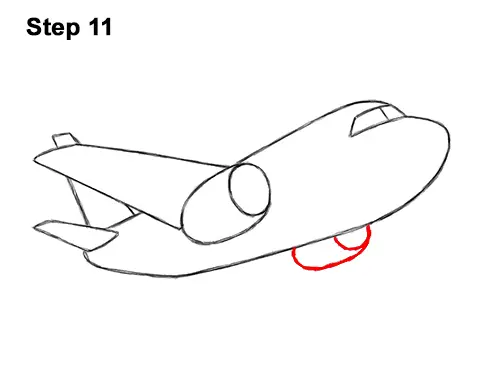
Step 11: Under the airplane, draw a half-circle for the visible part of the other engine. Add a short, curved line to the left to complete the visible shape of the other engine.

Step 12: To the right of the airplane's second engine, draw a line that slopes down for the front edge of the second wing. To the left of the second engine, draw a line that slopes to the right for the back edge of the second wing.

Step 13: Draw a curved line on the nose of the airplane for extra detail. Draw a series of small squares along the side of the body of the plane for the windows. Lightly sketch two long, sloping lines along the side of the plane. Then divide the windows using shorter vertical lines. The engine will be blocking some of the windows. Make the windows near the back smaller.

Step 14: Using a pen or marker, carefully go over the lines to make your airplane drawing permanent. After inking, get rid of every pencil mark with an eraser.

πηγή: https://easydrawingtutorials.com/
Σχόλια
Δημοσίευση σχολίου